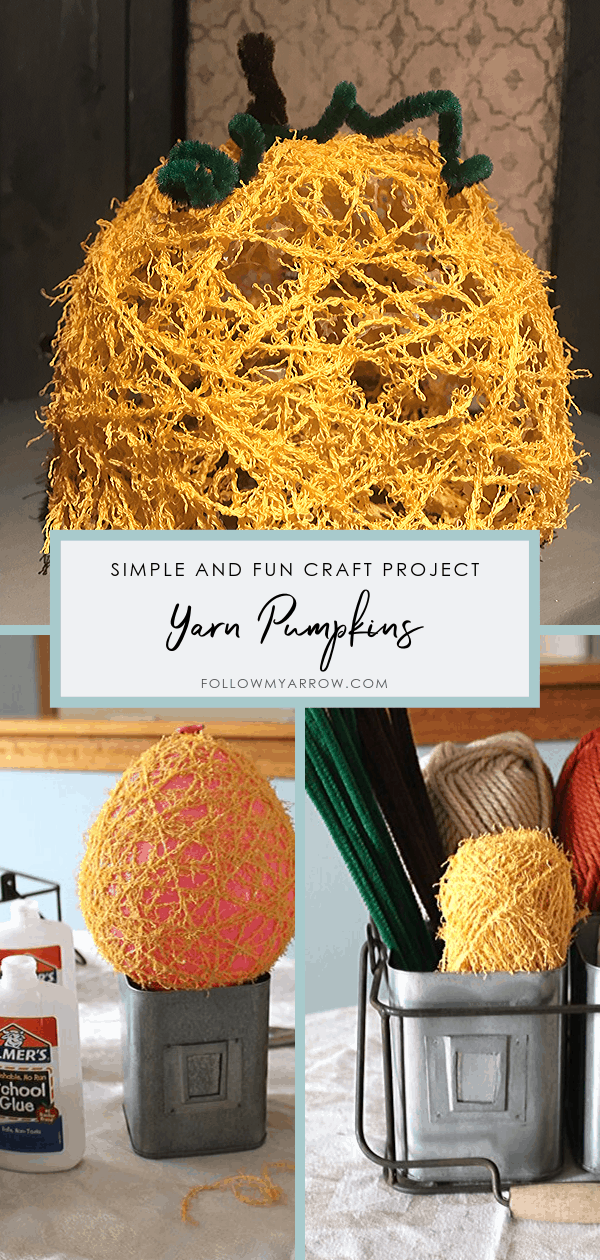
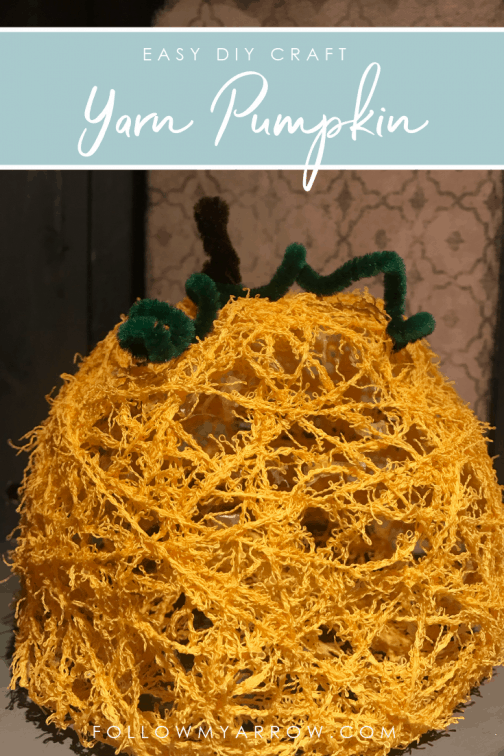
Easy Yarn Pumpkin Craft
The Leaves are Falling… It’s Pumpkin time! Here’s a super simple and inexpensive Fall yarn pumpkin craft you can do with kids (and adults!) of any age! I’ll warn you though, it is a bit messy so make sure to do it in an easy to clean area 😉 We did it in the kitchen on a washable linen tablecloth so I could just pop it in the washer when we were done. Hint: everything used is washable for this one 🙂
This post contains affiliate links, meaning, at no additional cost to you, if you click through and make a purchase, I may receive a commission. I only share items that I truly love and use myself. For more information please see my disclosures here.
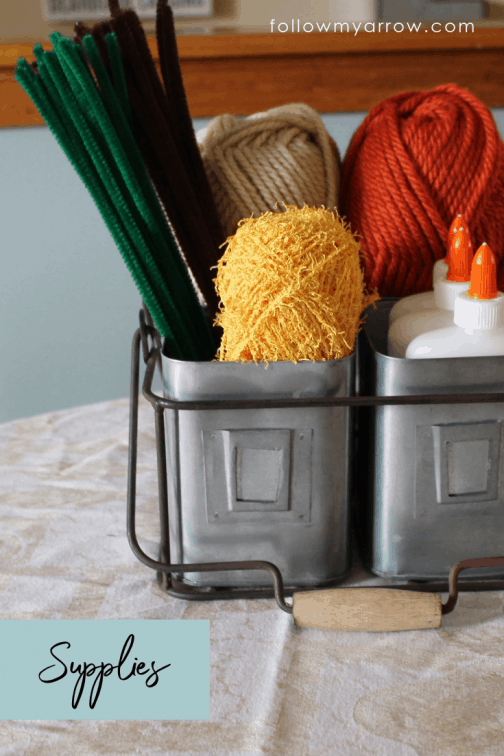
What you’ll need:
- Yarn – thin/lightweight works best
- Pipe cleaners – Brown and Green
- Glue – We used Elmers
- Balloons – Any size/color will work just fine. Hint: The size/shape of your pumpkin will be determined by the balloon you choose.
- Scissors – Make sure they are sharp and you don’t mind a little stickiness on them;)
- Stand of some sort – We used our handy-dandy supply caddy but glasses/cups/mugs would also work. You just want something to hold your creation steady while it drys.
- Bowl – Something easy to clean or can be thrown away as it will hold the glue. Disposable plastic bowls work nicely;)
Hint: Need some suggestions for supplies? Click on the links above or you can find my recommended items from Amazon at the bottom of this post:)
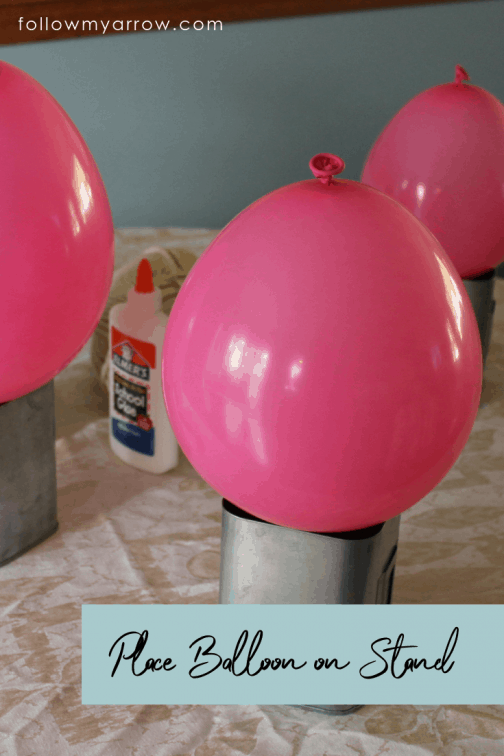
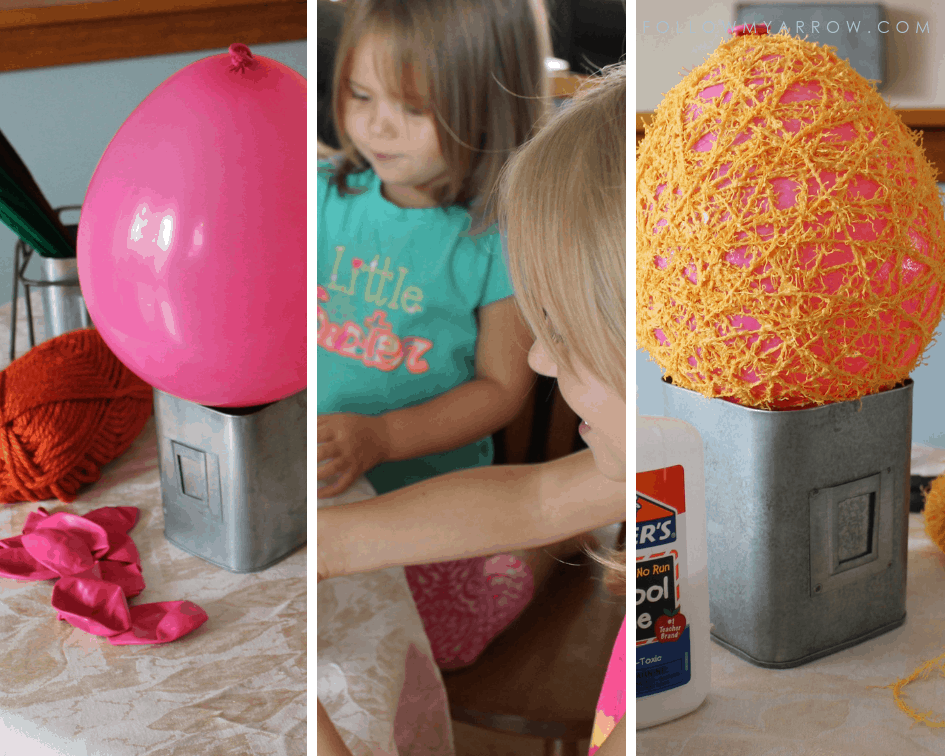
Step 1)
Blow up the balloons to your desired size. Hint: To create a more “round” shape, don’t overfill your balloons. Leaving them less inflated will help avoid the teardrop shape.
Step 2)
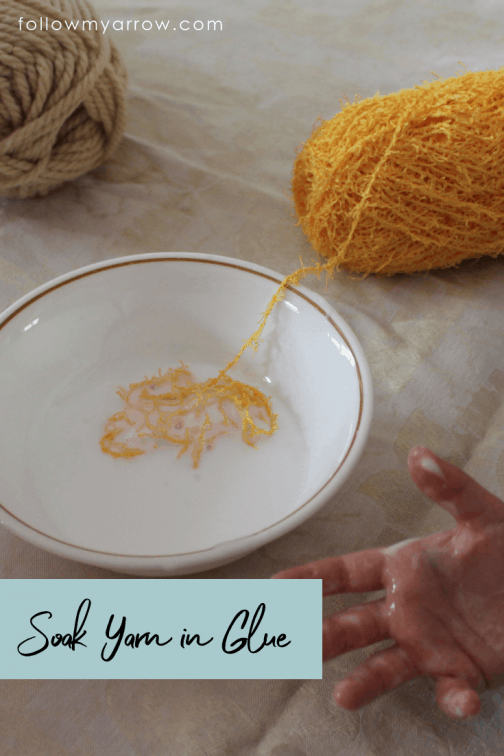
Pour glue in a bowel and soak your chosen yarn in the glue. Hint: Don’t cut the yarn. You can gradually add more from the skein as you need it.
Step 3)
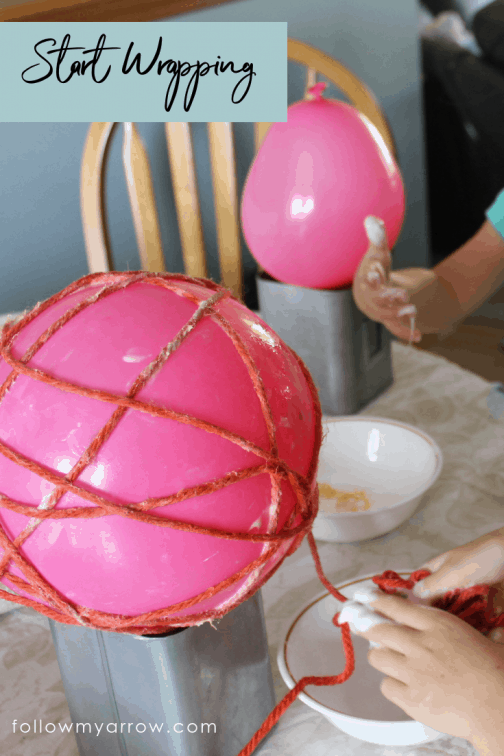
Get your wrap on! Well, not really but you do need to start wrapping your balloon:) The easiest way to start is at the bottom of the balloon where you can loosely tie the yarn around the lip of the balloon. From there you can either tightly or loosely wrap the yarn around the balloon changing direction to create the desired coverage and look you are working for. Hint: Make sure you are consistent with the tension of yarn wrapping. You will want to continue to wrap tightly if that is how you start and vice-versa. Otherwise, your creation will not adhere together securely when drying.
Step 4)
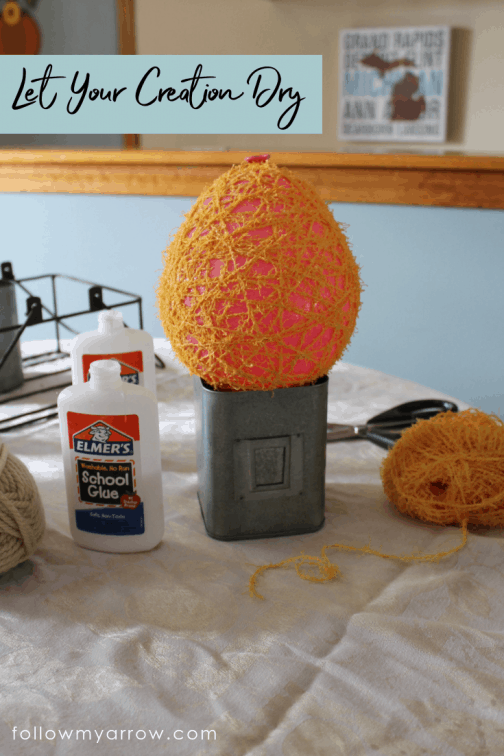
Let your masterpiece dry AT LEAST overnight, ours required two nights. What you are looking for is all strands COMPLETELY dry. Then, pop the balloon and gently remove it from the center of your pumpkin. This will require some gentle persuasion especially if your kiddo really got into the glue application:) Hint: If you complete the final step before it is COMPLETELY dry, you’ll end up with a knotted ball of gooey yarn, not a pumpkin.
Step 5)
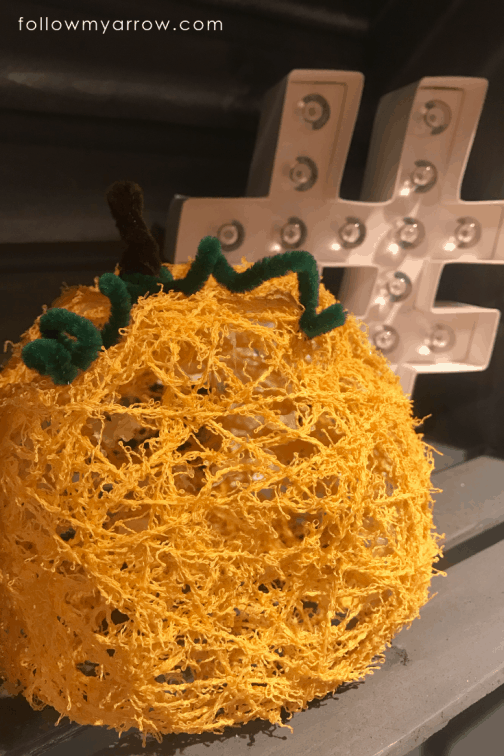
Now you can shape/style and add your pipe cleaners for a stem and leaves/vines. Hint: If your pumpkin came out with a bit of an odd shape, don’t be afraid to gently push in/down the top or bottom to create the desired look you are after! We pushed in the bottom a bit as it was more of a teardrop shape than we wanted. This, in turn, allowed our pumpkin to sit better making it easier to display with our Fall decor.
That’s it! Have fun, get creative, and make it your own!
We’d love to see yours, share your creations in the comments!
[amazon_link asins=’B07GXVVLBS,B07BNBCYCL,B00WN01VTO,B01BRGU8R0,B073FV4T73,B014GZSR4A,B01N33C2RW,B0742Q7PFZ’ template=’ProductCarousel’ store=’Follow My Arrow 1′ marketplace=’US’ link_id=’03367250-bdb5-11e8-b8d4-6b7488f31e71′]
Love it? Share it!