
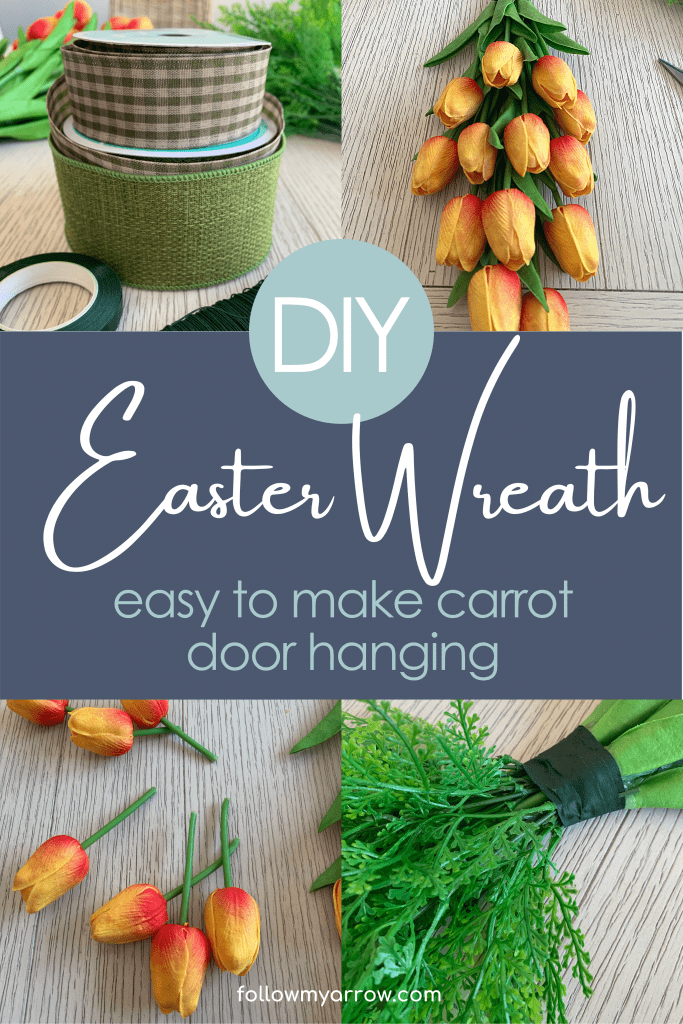
Easter is on its way and my door needed a facelift. I decided to create this adorable carrot wreath. It was super easy and budget-friendly. I purchased all of my supplies on Amazon but you can find them at your favorite local craft store as well. Be sure to let the littles share in on it too, it’s an easy one for them to assist you with as many of the steps are repetitive.
What you’ll need:
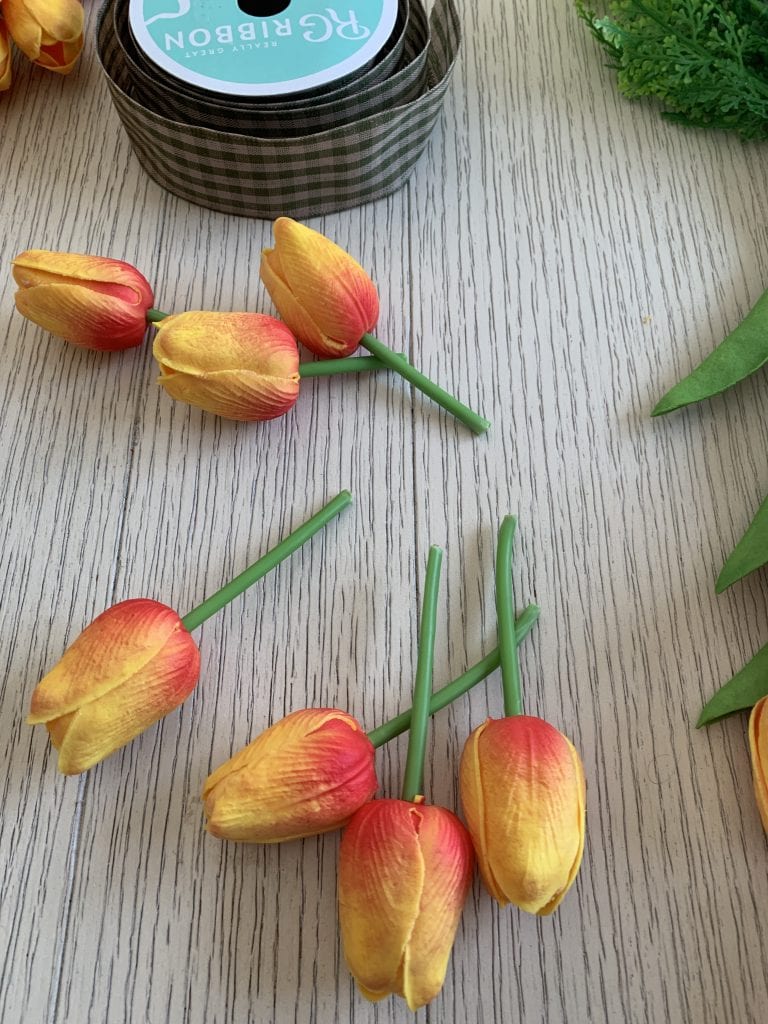
- tulips – You’ll want orange to replicate the carrot color. I used these which are very sturdy for exterior door uses.
- greenery – Something that emulates the carrot stems is best. My choice was another sturdy option which you can find here.
- ribbon – This can be theme-driven or a complementary green to match your greenery choices. I decided to stay with the rustic feel while playing in to my greenery. You can see my patterned choice here and my solid choice here.
- green wire – A floral wire works well here. Give this one a try.
- green tape – Again, a floral option is perfect. This is a good one here.
- glue gun – My go-to glue gun is this one. Works wonderfully for all of my craft projects.
- glue sticks – You’ll want to make sure you have enough to get through this project, running out is never fun. I buy mine in bulk here.
- wire cutters – I’m never without! These are a great pair.
- fabric scissors – This makes projects so much easier. While they are definitely not required, it is worth the investment if you are a regular crafter. Try these if you are looking for a good option.
Step 1:
Decide on the size of your carrot wreath. You’ll want to take into account where you plan to hang it for this step. Will it be over a mantle, on an interior for, perhaps a front for. Whatever you choose, make sure your size accordingly. For the wreath I created, it required 24 tulips.
TIP: I went with my front door so in addition to size, I also decided to use materials that could withstand the elements.
Step 2:
To begin, you’ll want to layout your pattern. Start at the bottom and layer each row on top creating the carrot shape you are after. The very first row you will want to be an odd number so, for instance, one or three tulips is best. Remember, you are looking for the carrot tip so it should be a point.
Once you have a good idea of your layout, take each row off and pile it together so that you can easily grab it when ready. I didn’t do this and it made for a more time-consuming project ?

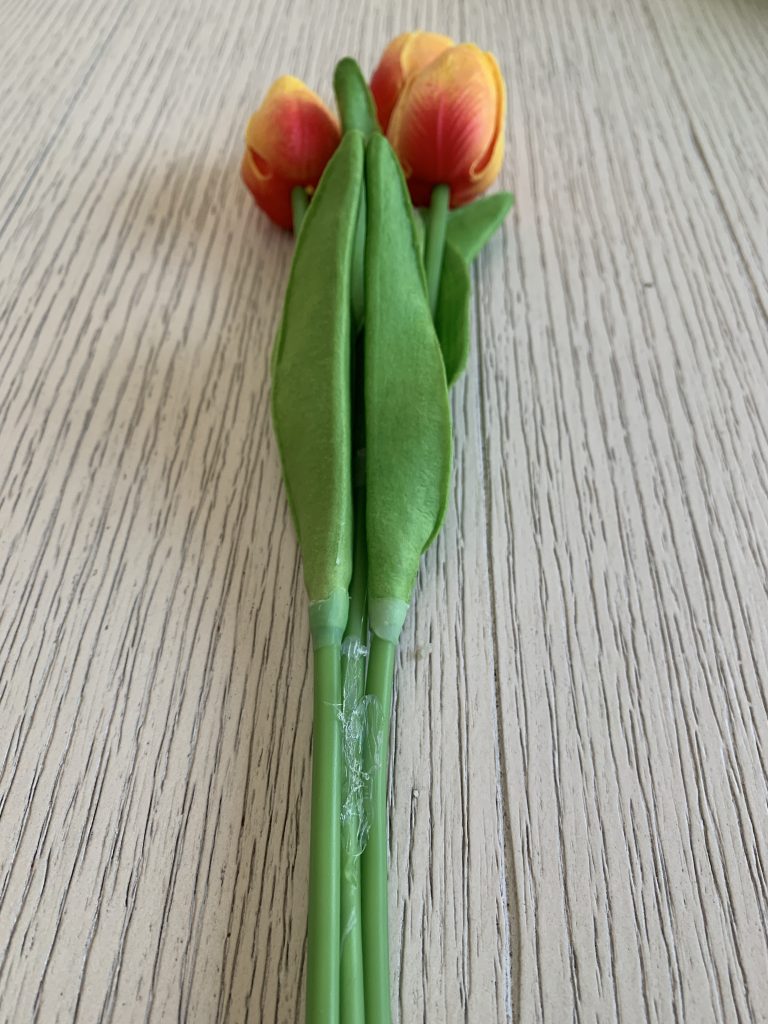
Step 3:
Now it’s time to glue! You are going to need to use your hot glue gun to adhere each tulip stem together as you go. Start by laying down your tip and then slowly add the second row, one tulip at a time. You’ll want to add one or two additional flowers to each row to create the carrot shape wreath. Take care to ensure each stem is tightly adhered and use the green tape as extra support if needed. You won’t see any of this after the carrot wreath is complete.
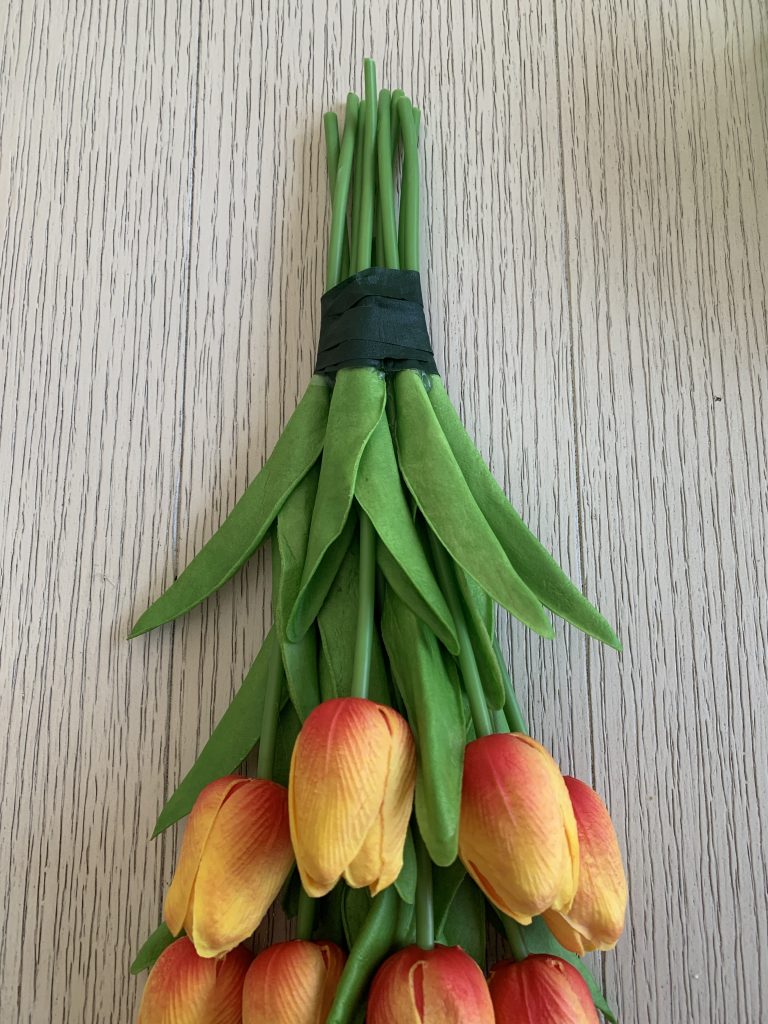
Step 4:
As you get closer to the top, you’ll want to stop about two rows shy of your goal. This area will be finished up at the end.
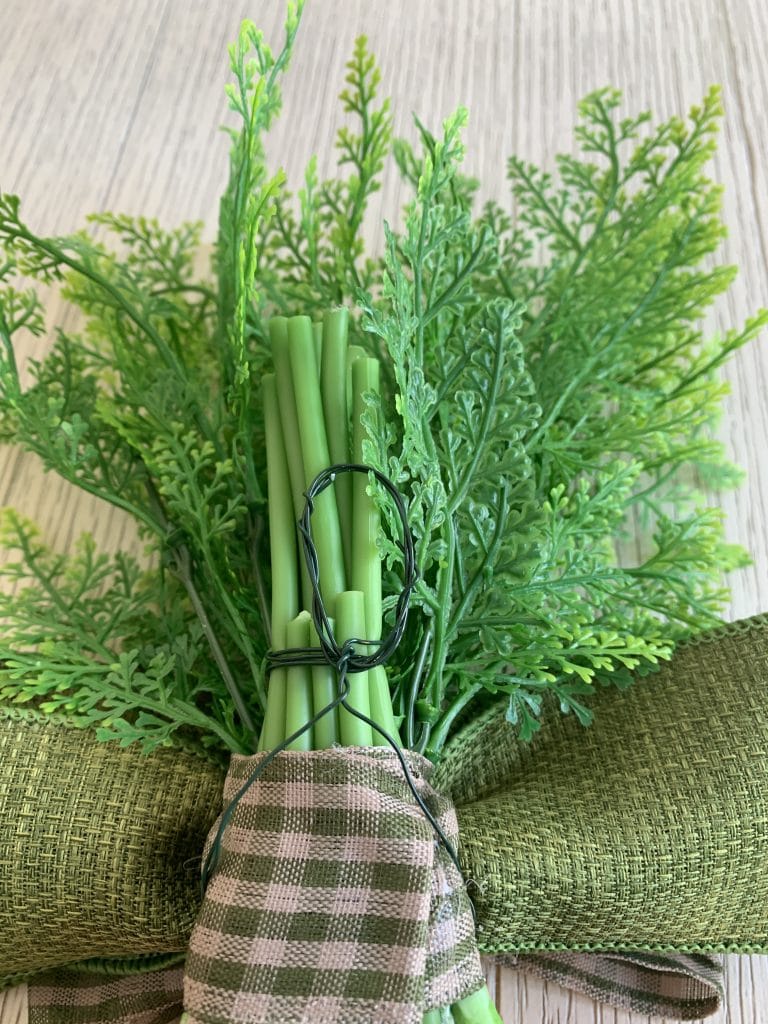
You’ll want to gather the stem ends for a final glue and tape up to make sure they are secure and sturdy. You can also cut the stems down to an even length allowing for about four inches above your final tulip row.
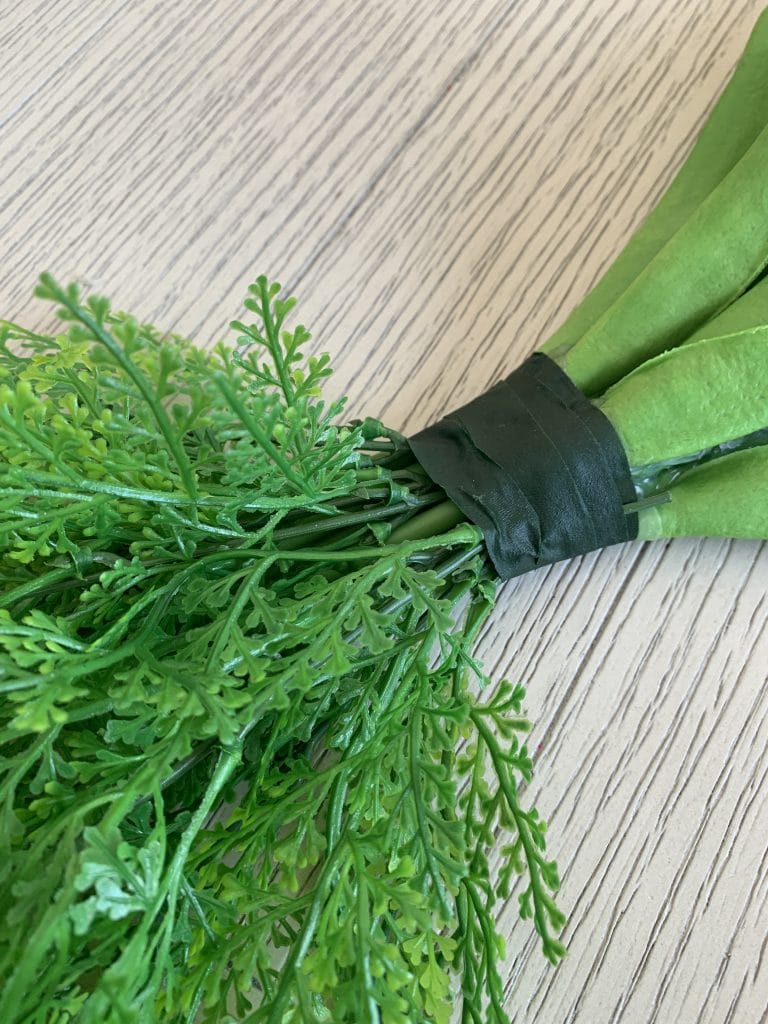
Step 5:
The carrot top is added next! You will probably need to cut down the stems of the greenery you choose for this. The goal is to have them short enough to just stick down into the tulip stems, between the green tape and glue you applied to secure all of the stems together. Don’t worry what this looks like, it’ll all be tided up in the next step.?
Step 6:
Now we’ll need to add in the final two rows of tulips we left off. Trim the stems to wedge the bottom row in first, adding in a touch of glue before squishing them in. Once those are secure start the final row. These may need very short stems or even no stems at all. Glue is your friend here. When you have them secure, you will want to take a piece of ribbon and wrap the entire bunch to create a finished look.
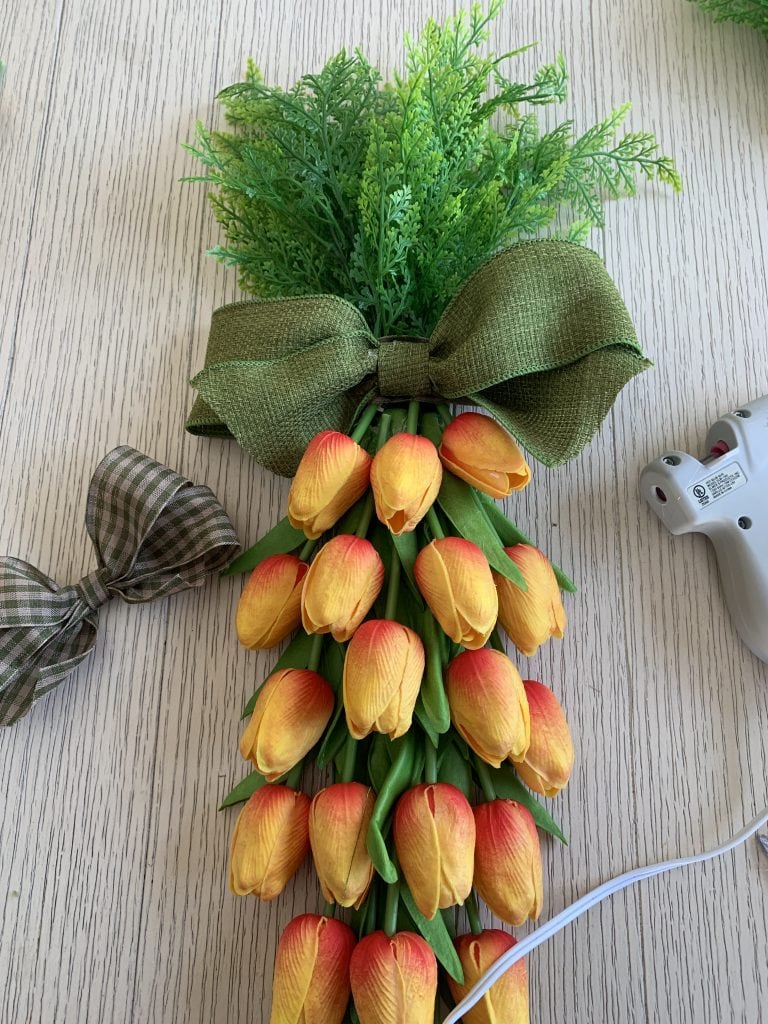
Step 7:
Time for some ribbon! Now, this is really the dealer’s choice. You can do a bow, create a flower arrangement, anything goes. I’ve done a bow in two layers to keep with the green and rustic feel. Have some fun here and make it yours!
Step 8:
Finally, you’ll simply need to take your green floral wire and create a hanger so that you can display your beautiful carrot wreath. To do this you can use the support you created right behind the bow. The easiest way is to fish a loop above and below that area then connect them with a larger, thicker ring to hook wherever you choose to hang. Easy peasy!
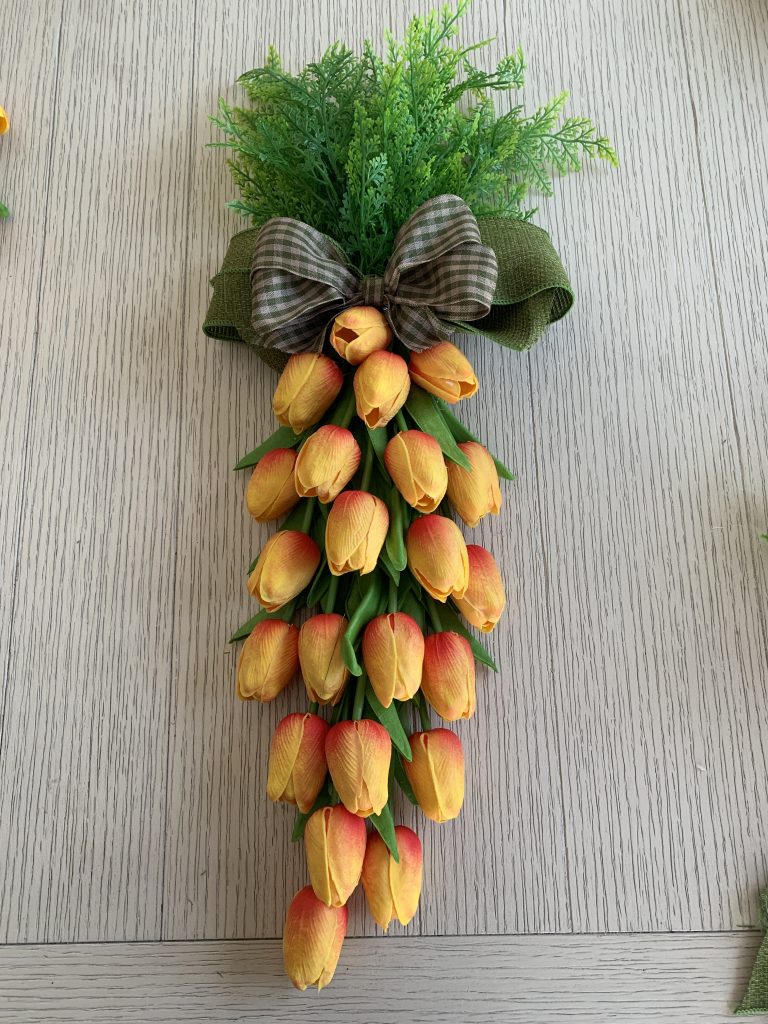
I hope you enjoy creating this fun little Easter project! Be sure to let the littles join in on the fun ? Share your experience in the comments!
Hi Jessica!!! This is what i was looking for on internet. Enjoyed every bit of your blog post. Really thank you! Keep writing.
Thank you so much!
Wonderful easy project. Thank-you
Thank you! It was super easy and the outcome just adorable 🙂